Facebook, or Meta, is a great place to advertise, but it's not exactly intuitive. Our marketing team has put together a guide to help any Medicare insurance agent start their first ad on Facebook.
And don't worry: you don't have to be an expert to start a simple digital advertisement on Facebook.
Why Facebook?
Facebook is, by far, the largest and most popular social media platform in the world with nearly 3 billion monthly users. On top of that, 1.6 billion people worldwide are connected to a small business on Facebook.
It's a great place to advertise, and you don't need a lot of money to get started. In fact, you can start running an ad for as little as $1 per day. Of course, you'll want to spend a little more than that to get the results you're likely looking for, but the barrier to entry isn't high.
Before you start creating an ad, you will need a Facebook page. We have a free download you can grab if you need help with that first step.
Do the 15-Minute Blueprint Course
If you're completely new to Facebook ads and want the best jumpstart, I'd highly recommend the 15-minute Blueprint course from Facebook. You'll learn how to create, publish, and purchase ads across Facebook, Instagram, Messenger, and Audience Network.
It's only four modules, with each one being 5 minutes long. At the very least, it'll familiarize you with the platform and you can come back to this article to learn more.
Add your payment information
One other housekeeping item is you'll need an ad account with your credit card information. When you sign up for Facebook, you're automatically given a personal ad account ID. You can see that ID by visiting Ads Manager (it's in the upper left corner).
In order to run ads, you need to add your verified payment information.
Great Beginner Option: Boost a Post
One of the simplest ways to promote your insurance agency on Facebook is to boost a previously published post.
You don't have to go into any uncharted territory for this – just click the "Boost Post" button from your main Facebook business page. Facebook recommends boosting posts that already have some good engagement with people who like your page. If your current followers enjoyed it, odds are others will, too.
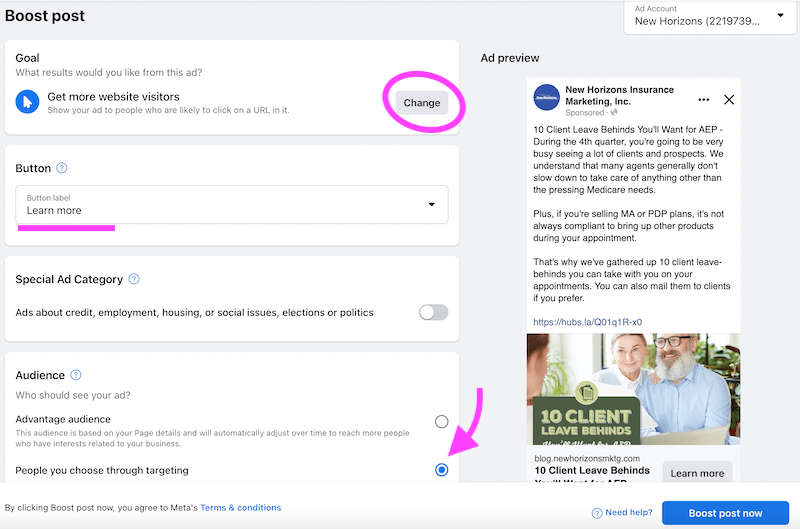
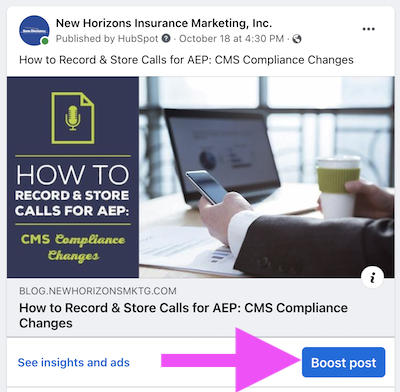 After you click Boost post, you can start customizing the ad. Choose your goal, button label, ad audience, and budget.
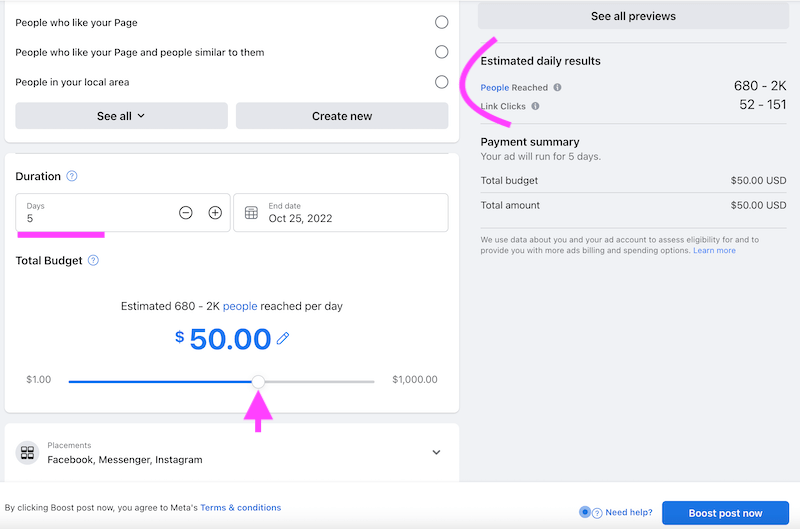
You can toggle the budget to see how many people you'll reach as well as an estimate for link clicks. When you're satisfied, click "Boost post now." And you're off!
Related: Marketing 101 for Independent Insurance Agents
Another Beginner Option: Create New Ads via the "Promote" Button
A different way to run an ad on Facebook is by clicking the "Promote" button on your Facebook business page.
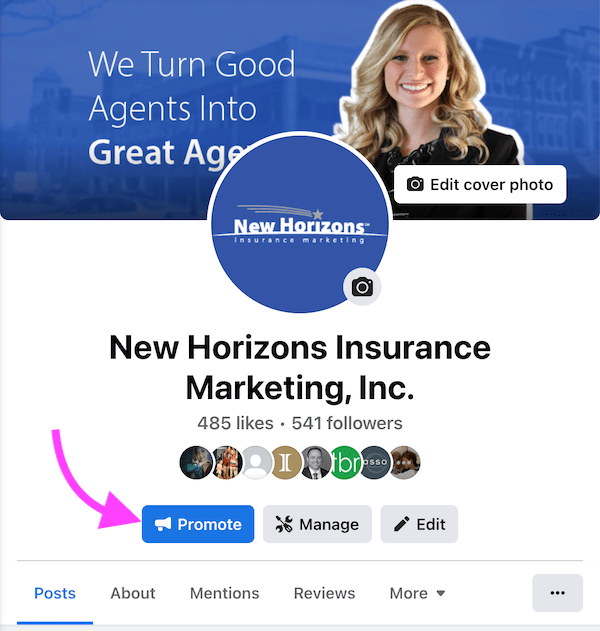
I would say this is a more advanced way to run an ad (versus just boosting an existing post). However, you will have more ad types and settings available.
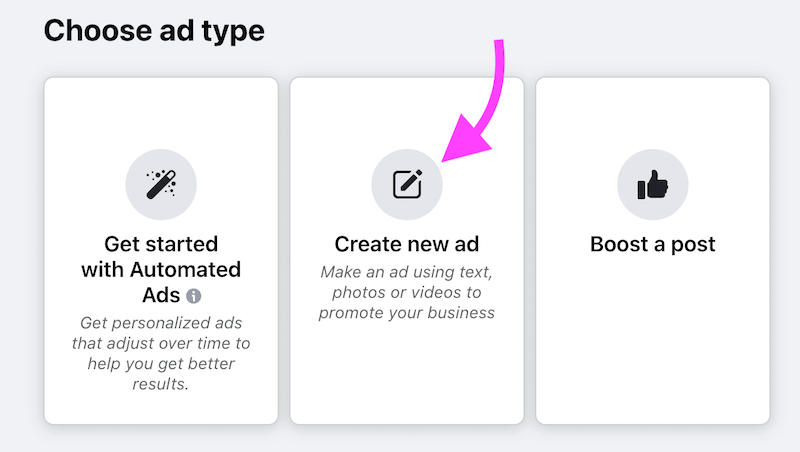
After you click Promote, you'll have the option to create a new ad or get started with automated ads.
Facebook explains that Automated Ads advertise your highest performing posts on a daily budget. This option basically boosts your posts for you. If you want more control over your ad, I would suggest clicking "Create a new ad."
 Here, you can choose a goal, write a description, upload any images or videos, write a headline, and select your button label.
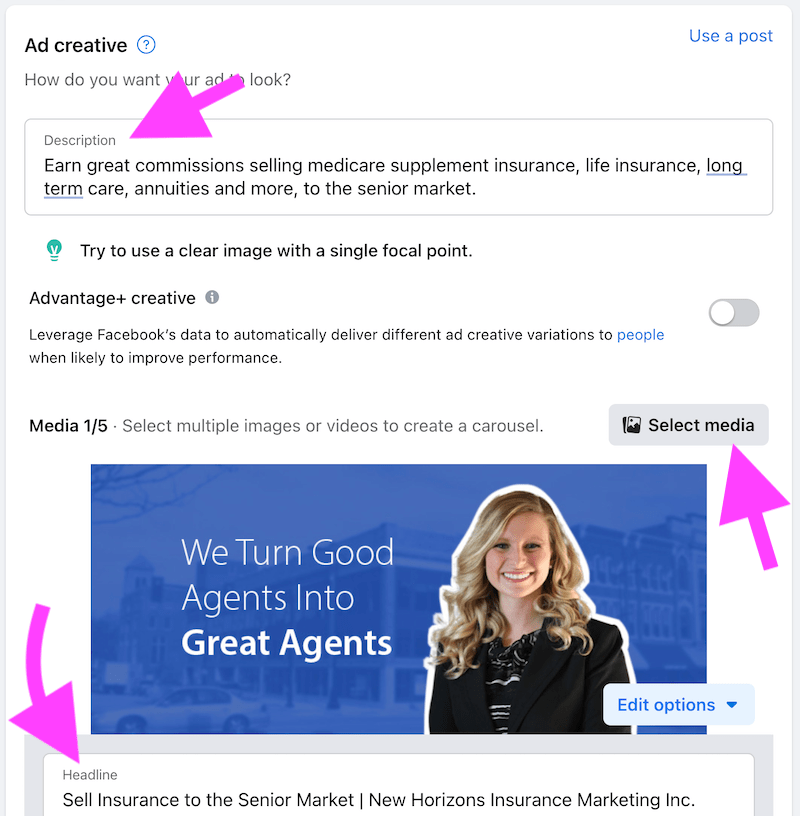
The other steps, like choosing your target audience and setting your budget, is the same as when boosting a post.
Boosting posts and using the Promote button
Boosting an existing post and using the Promote button on your Facebook business page are very easy ways to start running an ad.
I would recommend these two options for almost all Medicare insurance agents, because your time is best spent in front of clients. Once you get into the more complex way to run ads – Meta Ads Manager – you'll find yourself spending hours on ads instead of minutes.
However, if you are interested, we'll go over how to make an ad in Meta Ads Manager.
Best for Experts: Meta Ads Manager
If you decide it's time to turn things up a notch, you can create more complex ads using Meta Ads Manager. Meta Ads Manager is a hub where you can create, manage, and track ads.
If you're brand new to Meta Ads Manager, I would suggest the third lesson in the 15-minute Blueprint course from Facebook. It'll show the steps to get set up and add your payment method of choice.
Note: This area can be frustrating and complicated for many agents, so if you feel you aren't the most tech savvy, I would NOT recommend diving into this section. Alternatively, you can hire a digital marketer to help run ads for you. Need help finding a digital marketer? Consider checking freelance job platforms like Upwork.
Getting Started in Meta Ads Manager
To get started, click the green "Create" button.
 Then, choose your objective. If you're trying to get new clients, I'd recommend selecting "Leads."
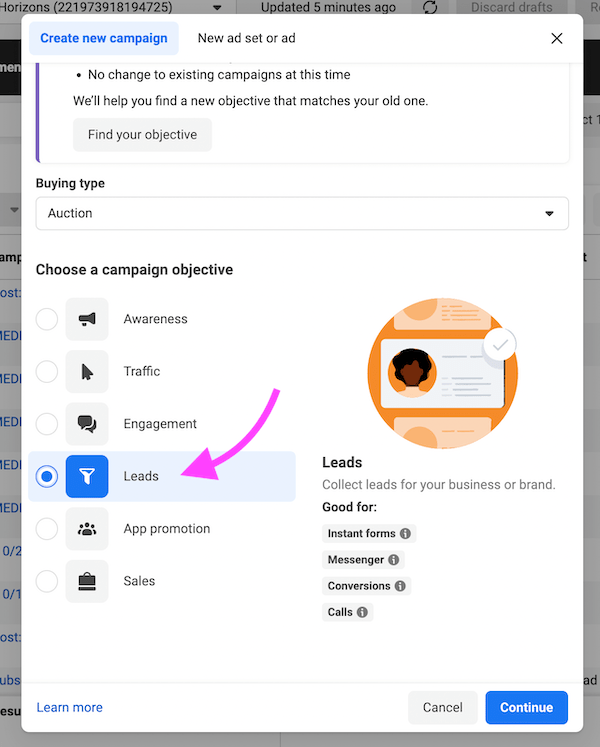 Then, you can create your first campaign.
Campaign Structure
Ads you create in Ads Manager have three parts: campaigns, ad sets and ads.
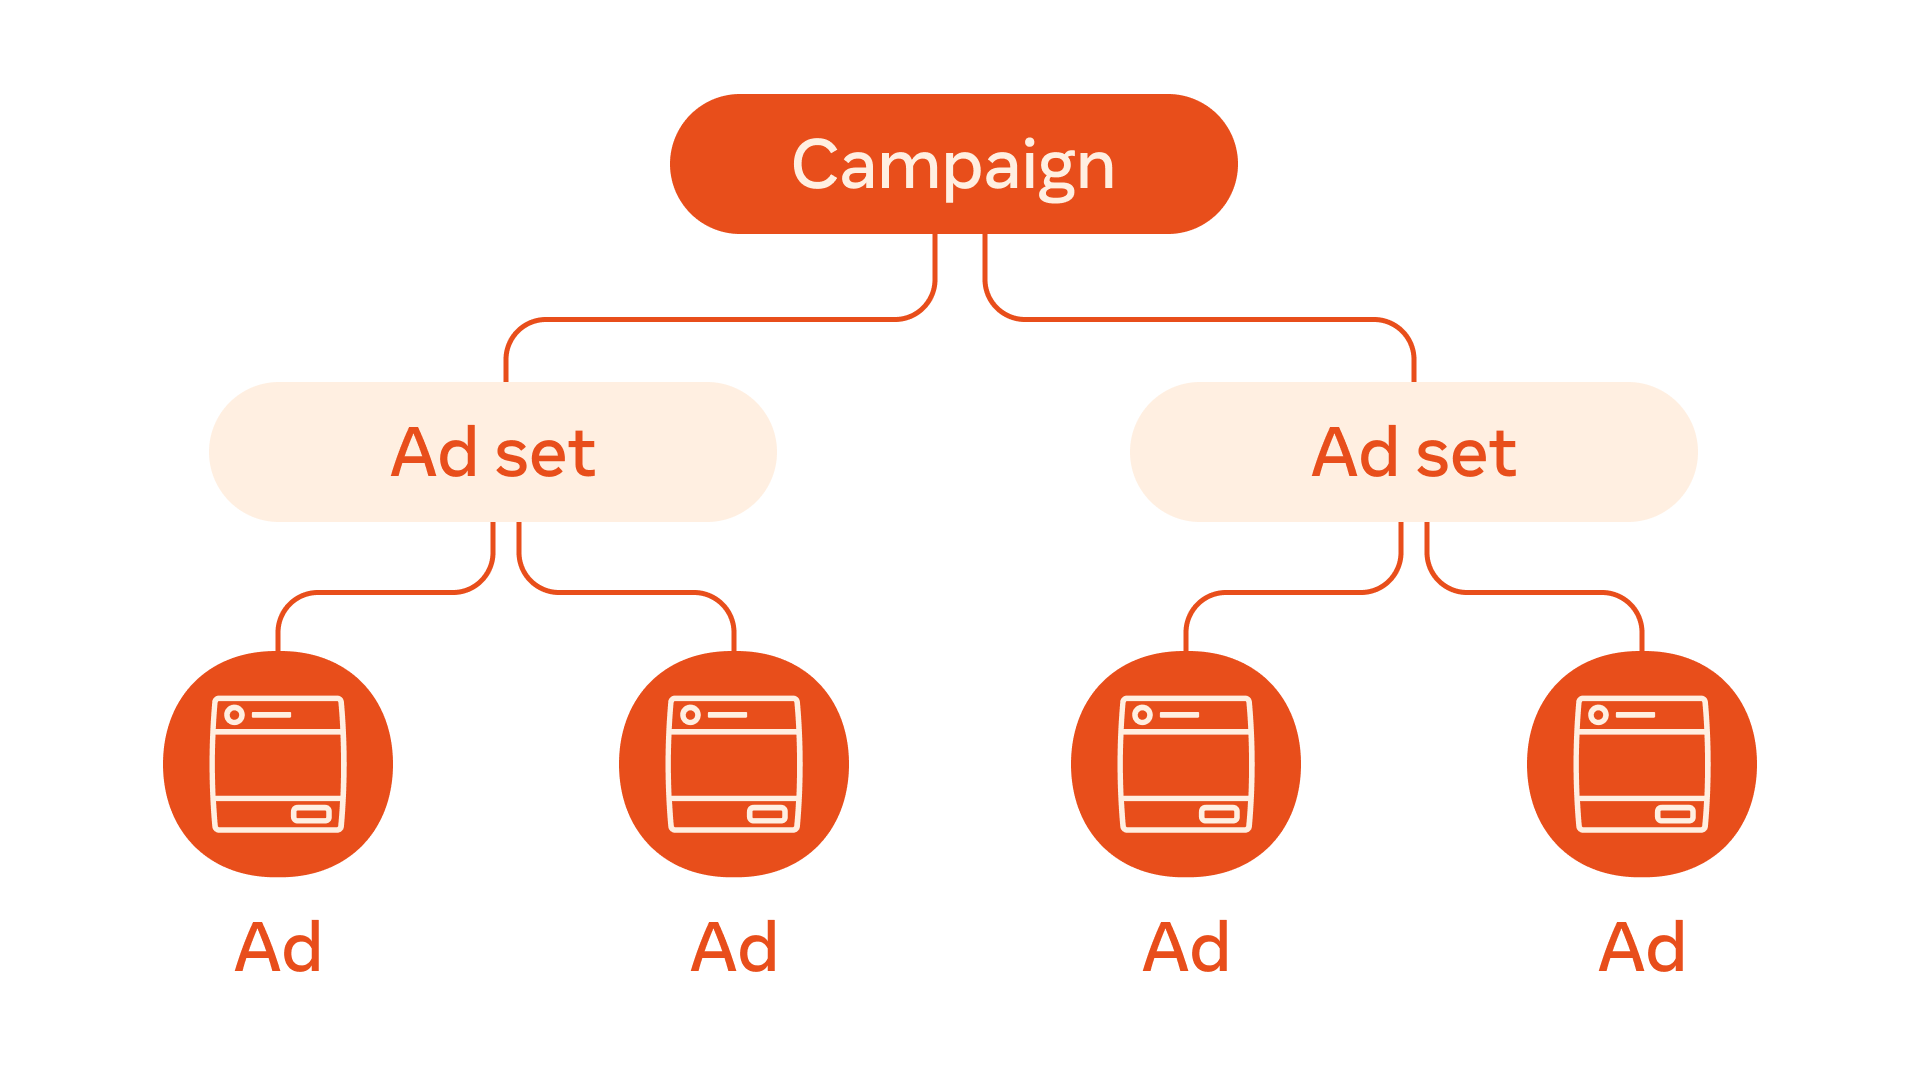
- Campaign: where you choose an objective for your ad. For example, your objective might be "Get more Medicare leads."
- Ad sets: where you decide on a targeting strategy and choose settings, which will influence what choices are available to you at the ad level.
- Ad: your actual ad, which includes the creative elements like copy, photo or video, and the button.
You'll want to keep this structure in mind as you set up your campaign, ad set, and ad.
Create a Campaign
In our example, we'll name our Campaign "New Medicare Leads."
 Then, I won't change any of the other settings on this page, and I'll click Next.
Create an Ad Set
In my first Ad Set, I'd like to focus on generating leads by asking people to fill out a form. Maybe in another ad set, I'll try phone calls or Messenger, but for now, I'll test out the Instant forms options.
I'll name my ad set "New Medicare Leads via Instant Form."
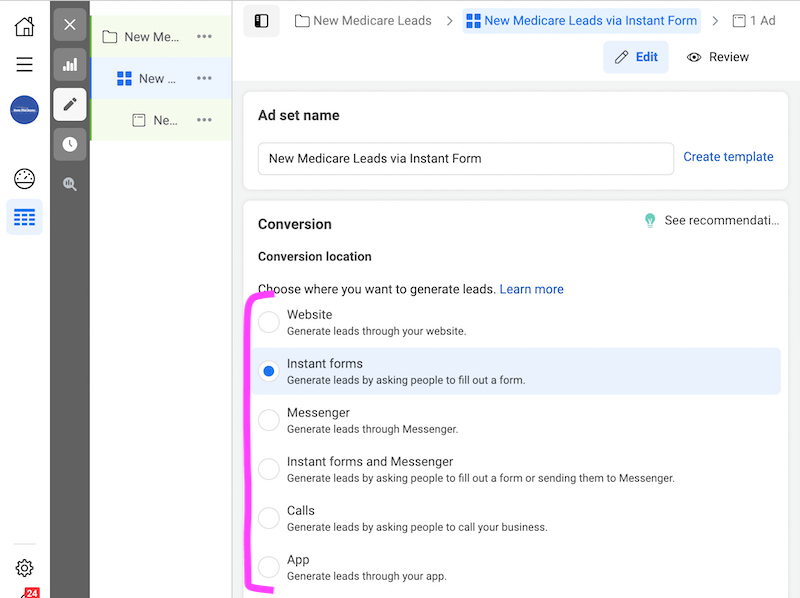 Then, you can scroll down until you get to the Budget & Schedule section.
Here, you can decide how much you want to spend and for how long. How much you spend will determine how many people see your ad and how many leads you can potentially get.
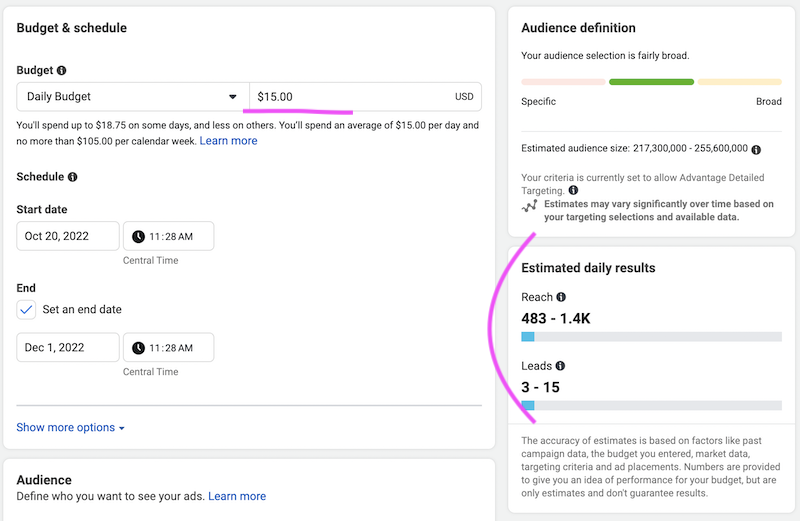 Then, you can create your audience.
I've decided to choose people living in Illinois who are 64-65+.
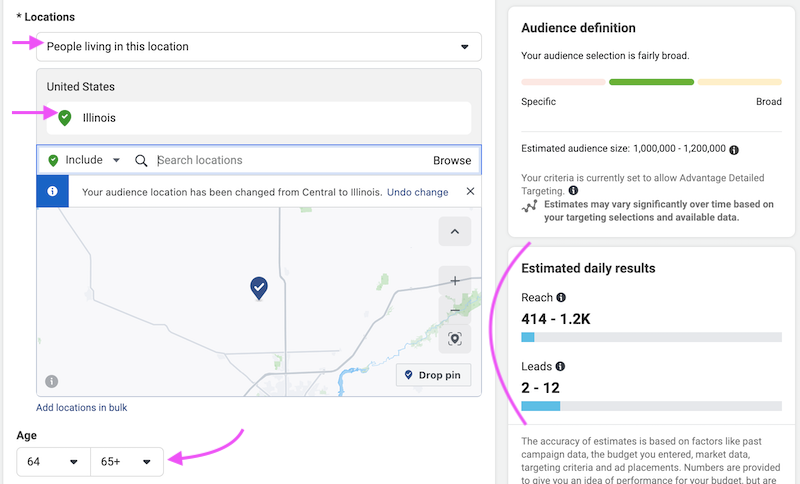
Now that I've selected my audience, my estimated daily results are more accurate. I'm finished here, so I'll click Next.
Create an Ad
To recap, I've created the Campaign (based on my goal) and Ad Set (choosing my targeting, budget, etc.). Now, I'm ready to create my actual ad.
I'll enter my primary text, image, headline, and headline description.
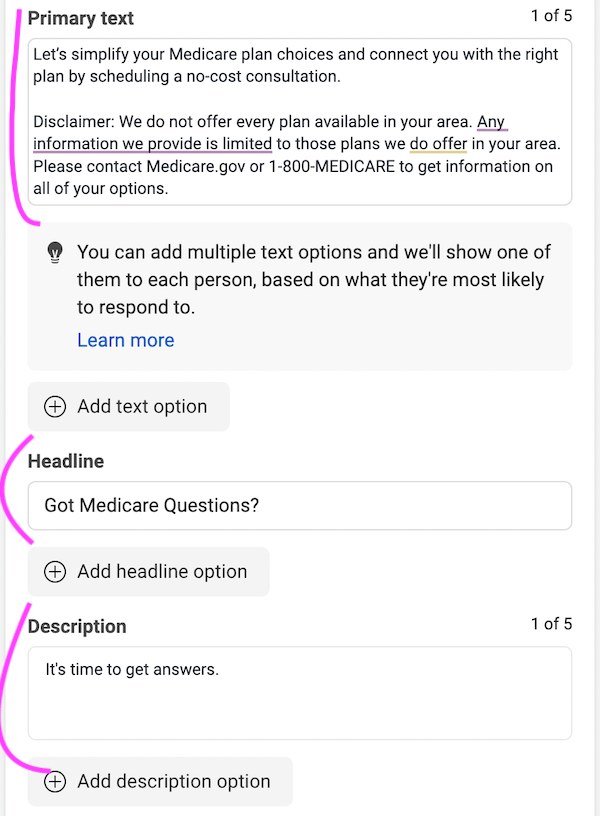
I'll also select my Call to action, which will be Book now. Here's the preview of my ad:
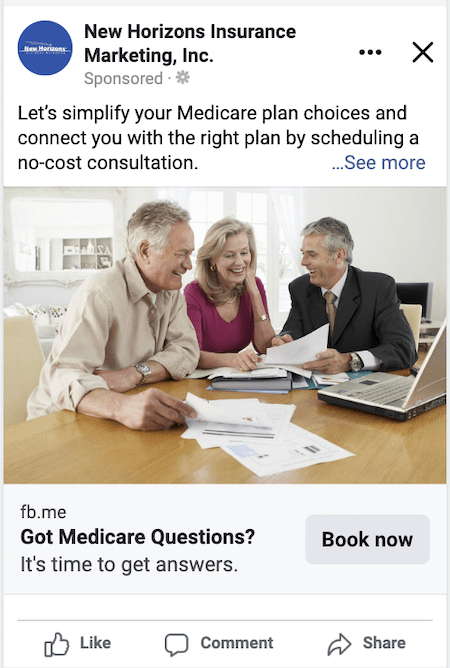
And since my ad uses a form as my call-to-action, I need to create that form. Under Destination, I can click the button that says "Create new."
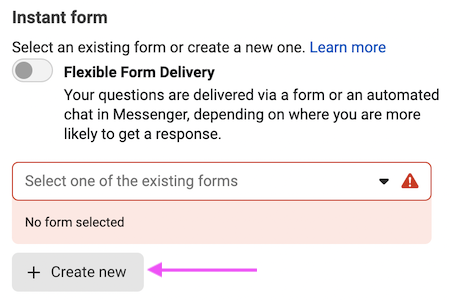
Now, I can add the fields that I need before I see a new prospect for the first time.
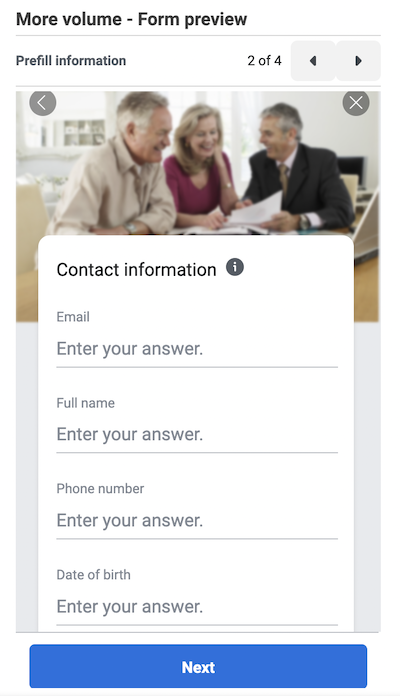 Note: Because you will be collecting customer information, you need to include a link to your company's privacy policy. Your link will appear with Facebook's default privacy disclaimer.
When you're happy with how your ad and form looks, you can publish your ad.
Don't forget to jump on a new lead when it comes in. You can read more about speed to lead here: 60 Seconds Could Be Costing You Thousands: Why Speed to Lead Is Critical In Insurance Sales
As you can see, you can get very specific when using the Meta Ads Manager, but it's far simpler to just boost a well-performing post!
Conclusion
You don't have to be a social media expert to start running ads on Facebook. If you're a beginner, we recommend boosting existing posts. If you want to get a little more creative, try clicking the Promote button on your page and creating a new ad.
For those who want the most control, check out Meta Ads Manager.
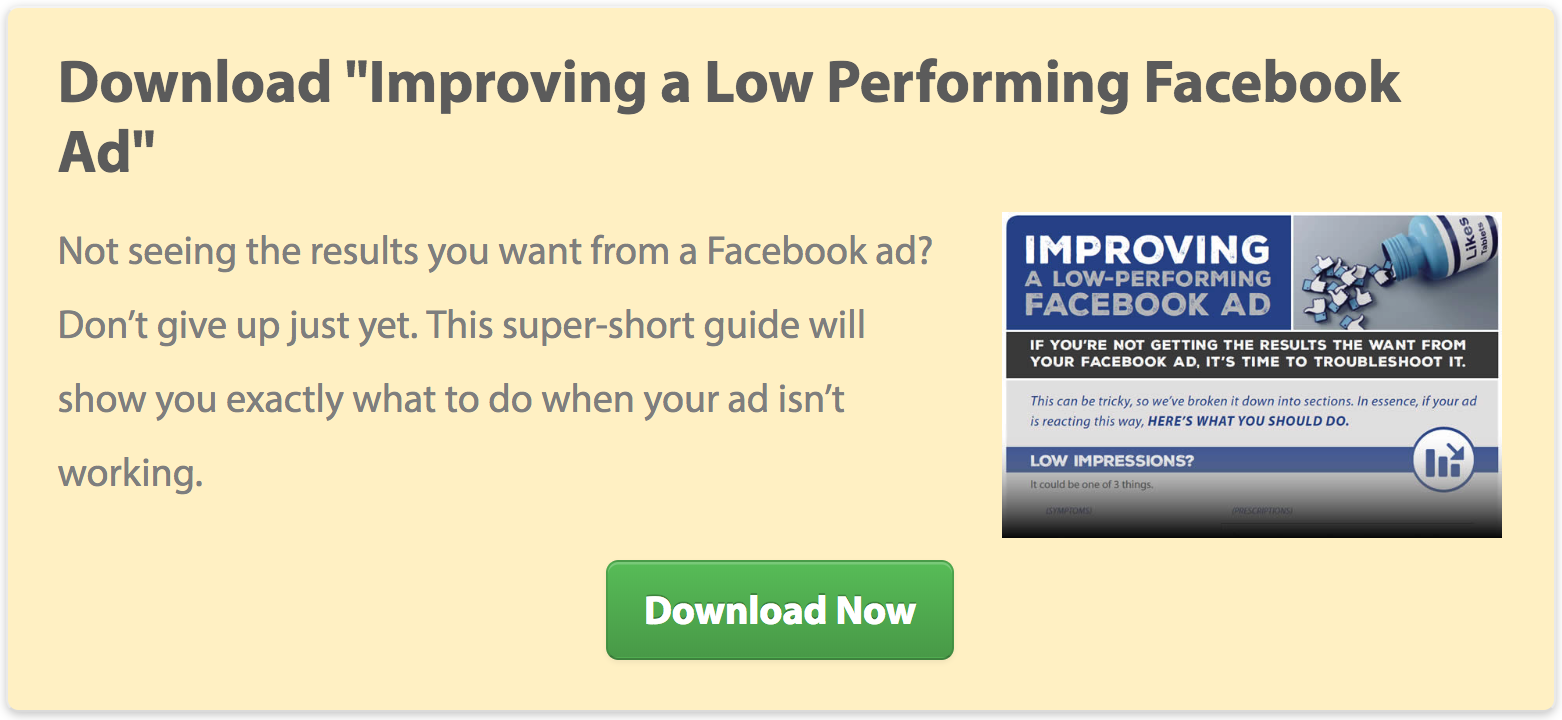
If you find that your ads aren’t performing like you thought they would, we’ve put together a short guide that will help you improve them.
You’re ready – it’s time to start generating leads online! Good selling!


![The Simple Question That Drove $9M+ in Annuity Sales [Case Study]](https://blog.newhorizonsmktg.com/hs-fs/hubfs/NH-The-Simple-Question-That-Drove-9M-in-Annuity-Sales-Case%20Study%20(1).webp?width=220&height=119&name=NH-The-Simple-Question-That-Drove-9M-in-Annuity-Sales-Case%20Study%20(1).webp)


